Using the NPL API with Swagger UI
Prerequisites
Before this track, you should have:
-
A running NPL Runtime, either
- on your own machine: Developing NPL on your own machine
- in Codespaces: Developing NPL in Codespaces
- on NOUMENA Cloud: Uploading NPL Code
-
Created end users for the NPL application. See Creating users in Keycloak
This track uses the npl-init repository as an example.
Accessing Swagger UI
The NPL Runtime provides an interactive Swagger UI interface that allows you to explore and test your NPL API endpoints without writing code. This is particularly useful for:
- Understanding available API endpoints
- Testing API calls interactively
- Exploring request/response schemas
- Debugging API interactions
Once your NPL application is deployed and running, you can access the Swagger UI by navigating to the NPL Engine API URL.
When running locally the NPL Engine API URL is
http://localhost:12000/When running on NOUMENA Cloud the NPL Engine API URL can be found on the app overview page.
On NOUMENA Cloud, the Swagger UI is also available from the services tab > Swagger >
Visitbutton.
When running in Codespaces the NPL Engine API URL can be found in the port forwarding tab. See Accessing your application in Codespaces
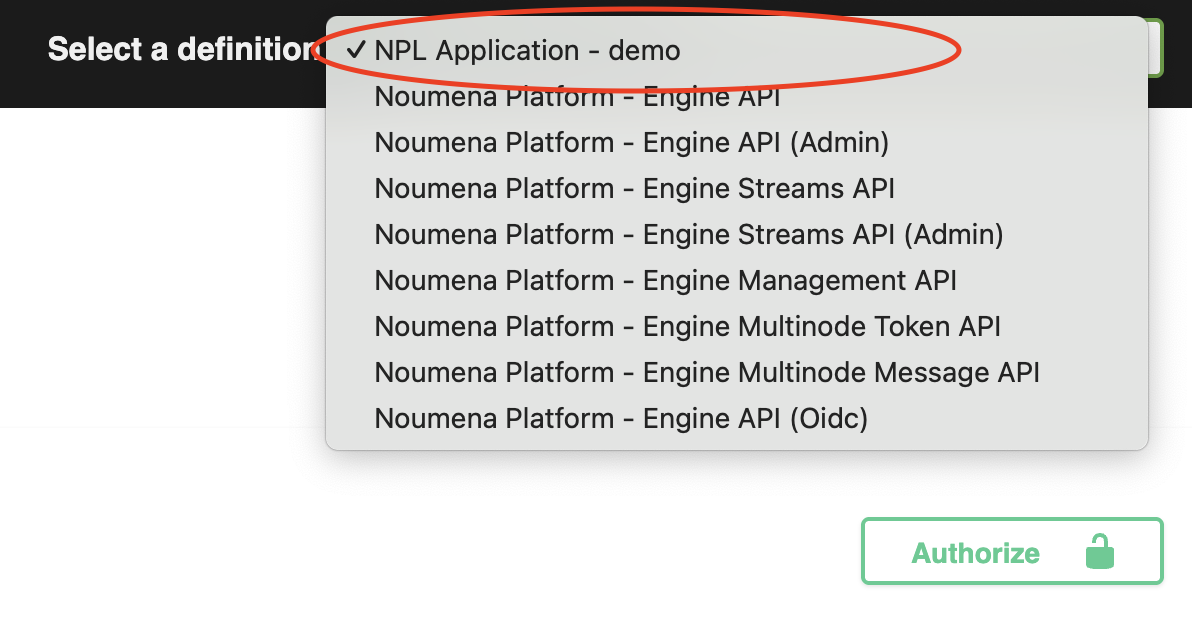
If you have deployed sources belonging to multiple packages, you can select the specific package you want to explore from the dropdown menu in the top right corner of the Swagger UI.
Authentication in Swagger UI
All access to NPL protocols requires valid JWT tokens. The Swagger UI provides a convenient OIDC login flow for authentication:
- In the Swagger UI, click the "Authorize" button (usually located in the top right)
- Find the "oidc (OAuth2, password)" authorization section
- Enter credentials of an end-user for the NPL application:
- Username: Enter your username (e.g.,
alice) - Password: Enter your password (e.g.,
password123) - Client ID and Client Secret: On NOUMENA Cloud and locally with
ENGINE_DEV_MODE, these are pre-populated and don't need to be changed
- Username: Enter your username (e.g.,
- Click "Authorize"
- Click "Close"
The OIDC flow will automatically handle obtaining and managing your JWT token. Once authorized, all subsequent requests made through the Swagger UI will automatically include your authentication token.
Exploring API Endpoints
The Swagger UI organizes endpoints by protocol. For each protocol annotated with @api, you'll see:
Protocol Creation Endpoints
- POST
/npl/{package-name}/{ProtocolName}/- Create new protocol instances
Protocol Instance Endpoints
- GET
/npl/{package-name}/{ProtocolName}/- List all protocol instances - GET
/npl/{package-name}/{ProtocolName}/{instanceId}- Get specific protocol instance - POST
/npl/{package-name}/{ProtocolName}/{instanceId}/{permissionName}- Call permissions on protocol instances
Using Swagger UI to Test Your API
Creating a Protocol Instance
- Navigate to the protocol creation endpoint (e.g.,
POST /npl/demo/HelloWorld/) - Click "Try it out"
- Modify the request body as needed:
{ "@parties": {} } - Click "Execute"
- Review the response, which will include the protocol instance ID
Listing and Viewing Instances
- Navigate to the list endpoint (e.g.,
GET /npl/demo/HelloWorld/) - Click "Try it out"
- Click "Execute" to see all instances you have access to
- Use the instance view endpoint to examine specific instances in detail
Calling Permissions
- Copy the instance ID from the creation response
- Navigate to the permission endpoint (e.g.,
POST /npl/demo/HelloWorld/{instanceId}/sayHello) - Click "Try it out"
- Enter the instance ID in the
instanceIdparameter field - Provide any required request body parameters
- Click "Execute"
- Review the response
Understanding Request/Response Schemas
The Swagger UI provides detailed schema information for each endpoint:
- Request schemas show the expected structure of request bodies
- Response schemas show what data will be returned
- Parameter documentation explains path parameters, query parameters, and headers
- Examples provide sample requests and responses
Click on any schema section to expand it and see the full structure with data types and descriptions.
Tips for Using Swagger UI
- Use the "Models" section at the bottom to understand complex data structures
- Check response codes to understand different success and error scenarios
- Use the "Download" button to export API specifications for external tools
- Test edge cases by modifying request parameters and observing responses
- Copy curl commands using the "Copy" button for use in scripts or external tools
Troubleshooting Common Issues
Authentication Problems
- Ensure your JWT token is valid and not expired. If your token is expired, go again through the Swagger UI authentication step.
- Verify that the user has appropriate permissions for the protocol operations
Missing endpoint
- Confirm that your protocol or permission is annotated with
@api - Verify that the protocol has been successfully deployed
Permission Errors
- Ensure the user matches a role authorized for the specific protocol instance and permission. For more details, check party model
Next Steps
After successfully using the Swagger UI to interact with your NPL API, you might want to:
- Deploy your application to NOUMENA Cloud
- Integrate your NPL application with external services using the generated API documentation
- Set up an IAM with Keycloak